Table of Contents
Installation
In order to run Reflex, there are two alternatives: get the precompiled binaries or get the latest sources and build the Reflex library from them. Once you have Reflex in a executable state, you can play with it. We will see all the necessary steps to bring Reflex to this state in this section.
Note:
Normally you would think that the precompiled binaries are “more stable” than the sources (as that is the normal situation in several projects). But in Reflex, the scenario is different: tipically, the latest source code is fairly stable and as you would expect, it contains the latest features and bugfixes. Another advantage of this, is that if you use the sources, you are helping us to improve the general stability of the library and to thank you for your contribution, the developers are very responsive and usually fix bugs very quickly 
How to get the binaries
The Reflex binaries can be downloaded from this page. Reflex is distributed as a zip file which has the following contents:
reflex
   +----- lib                Reflex and its dependencies
   |
   +----- src                Reflex source
   |
   +----- build.xml          Ant build file
   |
   +----- license.txt        The license file
If you choose this way to get Reflex, you can go directly to test the installation.
Compiling from the sources
First of all, you need to obtain the sources from the Reflex Subversion repository which access information is:
Location: http://reflex.dcc.uchile.cl/svn/base/trunk/
User:     guest
Password: guest
With the previous data you have to do a checkout from the repository:
% svn co http://reflex.dcc.uchile.cl/svn/base/trunk/ reflex
This will create a reflex directory containing the Reflex sources. The directory structure of the source is:
reflex
  +----- lib                  Reflex dependencies
  |
  +----- src                  Java source
  |
  +----- build.xml            Ant build file
  |
  +----- (other files and folders)
Notice the existence of other files and folders, we will not review them as the relevant ones are those listed previously.
Once you have the sources, you will need the apache library ant, instaled and configured.
Finally, as reflex does not have so many dependencies nor requires special system configuration, compile the sources is as simple as executing the following (when you are inside the reflex directory previously created by the svn command):
Windows:
    % ant.bat jar

Linux
    % ant.sh jar
This will create 3 new subdirectories:
reflex
   +---- bin
   |      This directory contains the compiled class files
   |
   +---- status
   |      This directory contains some txt files with information about
   |      the build process
   |
   +---- build
           +---- reflex-core.jar
           |        This is the main jar, containing all the necessary classes
           |        to run Reflex
           |
           +---- reflex-lib.jar
           |        This jar contains some utitily classes to help the programmer
           |
           +---- reflex-examples.jar
           |        This jar contains examples of the use of Reflex
           |
           +---- reflex-boot.jar
                    This jar contains some experimental code to allow modifications
                    of Java core classes
The first three files will be used in this tutorial (as said before, the last one's state is experimental).
Testing the installation
One way to test the instalation is to run one example from the distribution. There are two posibilities: run the following command:
Windows
    %java -classpath "lib\javassist.jar;build\reflex-core.jar;
                      build\reflex-lib.jar;build\reflex-examples.jar"
               reflex.examples.logmove.RunWithReflex

Linux
    %java -classpath "lib/javassist.jar:build/reflex-core.jar:
                      buildreflex-lib.jar:build/reflex-examples.jar"
               reflex.examples.logmove.RunWithReflex
Or use ant run it:
% ant test-installation
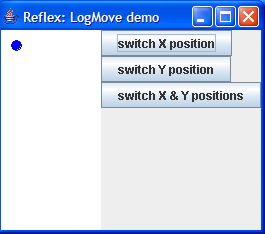
This will run the log move example from the distribution. Then, Reflex is correctly installed if a new window like this one opens:
